
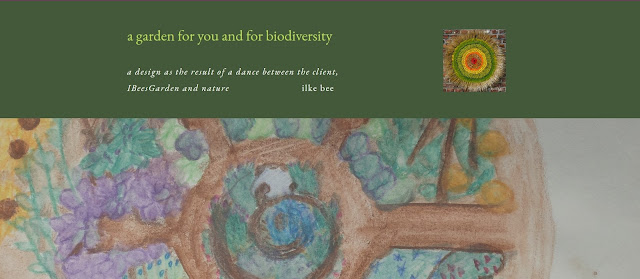
Wednesday, 21 March 2018
My new website on garden designing
Yes, I did it! I made a new website on my work as a garden designer. I invite you to have a look here at the new site and I hope to update it with more content in the near future.
Thursday, 28 January 2016
article about my garden in the Danish gardening magazine!
Click HERE to see the article as published in the Danish monthly magazine "Alt om Haven" (February 2016).
 |
| More photos of my garden in the article (use the link above) |
FIRST PAGE (side 40)
Introduction text "I
choose plants which attract beneficial insects"
When
permaculture designer Ilke Pedersen-Beyst and her family took over their
new garden two years ago, there was not much else than grass and some trees.
Since then, a lot has happened. Today, more bushes and fruit trees were planted
around the grass lawn in the garden. The neighbours have big trees, so their
garden is surrounded by green.
SECOND PAGE (side 41)
Text underneath photo
herb spiral and garden: Ilke Pedersen-Beyst has transformed an average
summerhouse plot into a flowering/blossoming little biotope with insects,
birds, hedgehogs, and edible crops. Follow the garden and its developments on
ibeesgarden.blogspot.com
THIRD PAGE (side 42)
Text underneath photo
strawberries:
Already the second year, the harvest of strawberries was satisfying. Enough to
have a surplus for some good homemade organic marmalade.
What are you doing in the garden now?
I am
very happy, because I just got my diploma as a permaculture designer. I will immediately
use my new skills and I am busy transforming the whole garden. The grass lawn
is getting smaller and smaller and I am working on getting more flowers in what
is left of the lawn. The kids also need to have space to play with the ball and
we have constructed some "living" structures made of willow for them.
My goal is to make a garden, that is edible, which is easy to maintain, and has
many different kinds of plants and flowers, that attract a big variety of bees,
birds, butterflies, dragonflies, hedgehogs, and even toads and foxes.
What is your biggest challenge?
For most
of the year, we live in Belgium, so the distance is of course the biggest
challenge. That is why I go to great lengths to design it in such a way that
there is a natural balance with as little maintenance as possible. I hope to
achieve this by using many perennials and increasing the biodiversity with wild
species that will give the garden more resilience; by choosing plants that
attract beneficial insects; by suppressing weed with ground covering plants and
mulch, like wood chips, that also improve the soil; and by creating
microclimates that give different kinds of plants the best circumstances.
What is your favourite plant?
That
is difficult to answer, because I have so many! All the wild and heritage
flowers and all berries are on top of my list. Especially old...
(continued
on FOURTH PAGE - side 43)
...and
lovely scenting shrubs with edible berries for both people and birds, like
elderberry, rowan, sloe, hawthorn and historical or wild roses. I also love
plants that have many things to offer, like for example oregano. It can be used
for cooking, it smells lovely, it is a fast ground cover, it is good for bees
and butterflies, and it supports other plants.
Do you have a favourite spot in your
garden?
Every
spot that is a bit protected from the wind and surrounded with butterflies,
bees, bumble bees, and birds, as well as with pretty flowers and scents.
How does your dream garden look like?
I
dream of a balanced garden filled with food for both people and wildlife with a
large diversity in species, ecosystems, and microclimates. I have seen
permaculture gardens just like that, where it was not necessary to irrigate, to
use fertilizers or pesticides, and where the harvest was big because of a very
healthy soil. I know it is possible and I would like to try it myself. It will
take some time, but I look forward to this exciting "dance" with
nature. You can follow the gradual, but big transformation of my garden on my
blog ibeesgarden.blogspot.com. In the future, I hope to help others to make
their own permaculture garden.
Text with photos on third and fourth page
1.
Part of the herbs in the garden are gathered in a stone herb spiral with the
most drought loving plants on top
2.
The blue cornflower (centurea cyanus) is easy and lovely and if you are good at
cutting off the faded flowers, you can prolong its season with an entire month
3. In
the lawn, the self-sown wild flowers make a rainbow of colours
4.
Ilke uses the dried seeds of nettle (urtica) to sprinkle on her salad
5.
Lavender (lavendula) is a hardy and drought resistant plant that looks nice
most of the year. Both the flowers and the leaves can be used as a lovely
scenting herb
6.
Sage (salvia) is a beautiful and easy herb that attracts many beneficial
insects and gives a great taste to many dishes
 |
| My lawn |
Wednesday, 20 January 2016
my herb spiral and the bees - part 3
How rewarding it is to build an herb spiral! If properly built and oriented, it is a showcase of the advantages of permaculture in a nutshell. Once built, your herbs thrive and need no extra water. Each little plant is situated in the right spot and microclimate to thrive and all you need to do is harvest them fresh just next to your kitchen door. The only thing, I do is to add some mulch just before the frost and to add some grass clippings once in a while. I would love to build a second one next summer, but first some extra tips and feedback.
 |
| My herb spiral: day 1 |
In previous posts, I wrote about the steps to build one and on the building of my own herb spiral. Once you have all the materials, it is quite straightforward to build one in an afternoon.
The thermal heat of the wall warms up the soil inside and lets your Mediterranean herbs flourish. Therefore, it is important to orientate the herb spiral correctly in relation to those sun loving herbs. The stones I used are not the best: natural stones store and release more heat!
In the meantime, I learned it is even better to situate your spiral on
top of concrete or a solid stone base, because - like with most heavy
structures - it can start sinking in the soil in the long run.
Also, the drainage is even better if build on stones. The only issue
then, is how to incorporate a deep water element at the base of the
spiral. In my experience, a shallow basin also works.
 |
| My herb spiral: one year old |
Finally, I love to observe the activity in and around my herb spiral. Bees, bumble bees, flies, hoverflies, butterflies, dragon flies, grasshoppers, beetles, and damsels go back and fro. The stone wall also acts as an excellent hiding place for little
spiders, lady bugs, and other little insects. An ant colony provides
some extra aeration and drainage in mine. I have not yet seen any
activity in the bumble bee nest, but a big spider installed in front of
its entrance might have something to do with it... If I ever want to see some
bumble bees in there, I will need to find a
way to keep the entrance free from predators.
I hope to have inspired some of you to build your own herb spiral and enjoy the harvest and activity around it!
I hope to have inspired some of you to build your own herb spiral and enjoy the harvest and activity around it!
Monday, 18 January 2016
celebrating achievements
Unfortunately, I do not have much time to spend in my garden abroad. My progress sometimes seems sooooo slow... Therefore, I thought it would give me some encouragement to note all the achievements so far. And then it suddenly does look impressive!
I am really happy and proud to have achieved the following:
 |
| A day's harvest of berries in July |
1. My main focus has been on the berries, with early and late varieties of gooseberries, currants, jostaberries, raspberries, wild strawberries, blackberries, grapes, blueberries, mulberry, elderberry, sea buckthorn, and of course strawberries. I created a berry area, but some of them are also spread over the garden situated in colder or warmer spots order to spread the harvest time. Each of the berry bushes has a good mulch circle around its base.
2. The more cultivated area - including the mandala bed - has got a nice structure with elevated beds and deep paths. The paths have a thin layer of very rough woody mulch, while the beds have several layers of chopped leaves, grass clippings, and chop-and-drop layers. One of the paths runs on contour with a small swale mound below it. Little walls made of branches protect the beds from wind. Some high poles make a tipi and even a little gate and tunnel which is waiting to be covered in green.
 3. I started with establishing some perennial and self-spreading herbs, flowers, and veggies! Between the wild oregano, sage, thyme, lemon balm, mint, sweet cicely, bear's garlic, and hyssop, some common mullein (verbascum thapsus, koningskaars, filtbladet kongelys), columbine (aquilegia, akelei, akeleje), borage (borago officinalis, komkommerkruid, almindelig hjulkrone), yarrow (achillea millefolium, duizendblad, almindelig røllikke), purple toadflax (linaria purpurea, walstroleeuwenbek , torskemund) red clover (trifolium pratense, rode klaver, rødkløver), pot marigold (calendula, goudsbloem, morgenfrue), and garden nasturtium (tropaeolum majus, Oost-indische kers, tallerkensmækker), now pop up different places each year. The biggest success in perennial veggies has been the lamb's lettuce (Valerianella locusta, veldsla, vårsalat) which has spread all over the garden as an edible ground cover! The first beds with asparagus were prepared.
 |
| My first harvest of organic garlic |
4. It was a special moment for me to collect my first harvest of lamb's lettuce, potatoes, curly kale, Viking spinach, purslane, peas, chervil, rhubarb, rocket salad, and garlic. All these were interplanted at the base of trees or mixed with the perennial herbs as part of companion planting. The beds created are not similar at all to traditional beds and sometimes I was the only one able to spot the harvest.
5. The growth of the herbs on the herb spiral looks stunning. I admit, I am impressed on how well this works. I will certainly dedicate a separate post on this topic.
6. The start of the guilds around the fruit trees can also be mentioned here. The main ground cover under the fruit trees are the wild strawberries, some red clover, and some bulbs, like narcissus, chives, garlic, and bear's garlic. In between the trees the fruit bushes are thriving. I wished it had progressed a bit more, but at least it is a start. Next season, I will add some lemon balm, oregano and mint.
7. I started with the propagation of berry shrubs and wild fruit trees. The first batch of new young gooseberry bushes is growing well! The next batch contains blueberries and cherry plum tree cuttings.
8. I had hoped to progress more with the planting of extra trees, but on the other hand, I am glad I waited a bit. Learning to know the garden and gardening in general, I changed my mind a couple of times on where and what to plant. So far, some hazelnut, a hamamelis, as well as a more tricky mulberry tree and a delicate nectarine tree were added to the apple, cherry, plum, sloen, and cherry plum trees.
 |
| A grasshopper hiding in the clover |
9. In general, I am truly impressed about the increase in biodiversity in the garden after I converted the lawn into more exciting habitats: an area with high grass; a wild spring flower lawn; deeply mulched beds; stone, earth, and wood structures; and some pockets left to grow wild. In addition, I created some shelters for earwigs, solitary bees, bumble bees, toads, ground beetles, and hedgehogs. The increase in the amount of lady bugs, dragon flies, damsels, beetles, caterpillars, worms, centepedes, hoverflies, spiders, bees, bumble bees, and butterflies is stunning! I will study a bit on how to identify them all and hope to post on fauna and flora species in the near future.
 |
| Pot marigold popping up in the garden |
10. I made my three first hugel beds! One tiny one with different species of heather and blueberry saplings. A horseshoe shaped one with blueberries, thyme, strawberries and oregano. An S-shaped one with sweet cicely, bear's garlic, gooseberries, nasturtium, and hopefully some pumpkins next season. These beds are perfect for the dry spring seasons here and are a great way to convert garden material into good soil!
11. Except for the newly planted saplings and plants, I did not have to water the plants in my garden at all! Denmark has a humid climate, but we are in an area with less average annual rainfall (650mm compared to 750mm at a national level) and the dry springs - and some summers - have been very challenging lately. Eespecially, the herb spiral, the hugel beds, the mulching, and the swale have been very effective.
12. I added about 100 new species of plants to the garden over a period of 2 years. This amount includes both seeds and saplings and covers herbs, veggies, flowers (wild and some cultivated), fruit shrubs, vines and trees. The previous owner had successfully planted about 40 plant species, including fruit trees and shrubs. And I haven't made an inventory of all the wild species in the garden yet.
Summing up the achievements does feel good and I hope to elaborate more on these and other topics soon.
lessons learned
Quite a lot has happened in the garden since I wrote about it last time. In the meantime, the studies, the workshops, the discussions with my fellow students, the books, and the feedback from nature gave me quite some stuff to think about. I will start with sharing some of the major conclusions so far and then come back to these topics in detail in future posts.
So, what were the major things I learned from the permaculture design courses so far?
 |
| not all methods to protect your land against wind erosion are equally effective |
2. How to analyse water management and turn the water into life and energy on your plot.
3. How essential it is to feed the life in the soil on a continuous basis and how to protect and cover it in order to let your own plants thrive.
4. How important biodiversity is in establishing a resilient garden with less disease and plagues.
5. How one can imitate and work with nature and even accelerate its processes and turn it into our advantage.
 |
| how to harvest water, avoid flooding, and replenish aquifers |
6. How important the design is in making life easier for ourselves.
7. How crucial it is to take time to learn from nature and observe small events happening in front of your nose.
I am sure I will find some more lessons learned later on, but these were pretty impressive to me. In between some news from the garden, I hope to elaborate a bit on these findings. I feel like it will be an ongoing process of learning and feedback to and from the garden.
Looking forward to continue the wonderful adventure in my garden.
 |
| a fresh supply of books waiting for me! |
Wednesday, 14 October 2015
my lecture on biodiversity and gardening
It was really great to be invited by the library in Sint-Pieters-Woluwe (Brussels) to provide a lecture on biodiversity and gardening. After one year of stuyding permaculture, I was eager to share some of the things I learned, but I think I was equally thrilled to be able to launch myself that evening as a garden designer !
It is a big step for me, but everything about it feels right! It combines hands on actions to improve our lifestyle and this in harmony with our environment. How to restore the land in its natural abundance and respect ethical principles for people and for nature.
 |
| Succession in nature and how to work with nature in your garden |
 |
| How to increase biodiversity with edges |
Finally, I would like to thank the organizers - and especially Linda - for inviting me! Thank you as well for the book voucher. These are the great books I was able to buy:
 |
| looking very much forward to read these! |
my garden design approved
So exicited to have my final work for the permaculture design course approved by Geoff Lawton. I choose our garden described on this blog and worked out a detailed design which I hope to implement in the coming years.
I hope this will lead to many more designs in future, both for people and for nature!

I hope this will lead to many more designs in future, both for people and for nature!

Thursday, 9 July 2015
my diploma!
Here is the reason for the long silence on my blog: I went back to study and followed two online courses on permaculture. I finished the first one and got my diploma as a permaculture designer!

I am so thrilled about it! I now will be able to "work as a consultant, teacher or designer and restore land to its natural abundance".
I really look forward to apply the things I learned in my own garden and hope to help others to create a natural abundance :-)

I am so thrilled about it! I now will be able to "work as a consultant, teacher or designer and restore land to its natural abundance".
I really look forward to apply the things I learned in my own garden and hope to help others to create a natural abundance :-)
Tuesday, 9 September 2014
my herb spiral and the bees - part 2
I finalized
my very own herb spiral! In a previous post, I mentioned the ideas and
steps on how to build one. I had to adapt my initial plans a bit, but all in all, I am
quite happy with the result. My first concession, was the location: due to many
reasons, I could not build one just next to the kitchen door. The current
location is still reachable "without making your slippers wet from the morning
dew when you pick your herbs” (freely adapted from Bill Mollison).
The current
location of the spiral, will provide me with an indirect advantage: an extra
shelter from the wind (and view) at my future private spot. It will create a little protected area between herb spiral, the
flower beds, and the garden shed. A partly hidden place where I can be on my own, between the
butterflies and bees and surrounded by different scents floating to me from the
herb and flowers nearby.
CR.jpg) |
| Strawberry runner inserted in outer wall |
The second concession
I made were the choice of stones. I inherited some old stones found in our
garden and from my neighbour. I decided to use these as a base for the herb
spiral and then to buy some of the same kind to be able to finalize the construction before the autumn.
There was no room for a big spiral so the stones were piled up with rather big
crevices between them and it all looked a bit too square to me. The result is not exactly what I had dreamed of, but
with some luck the matured plants will make the difference. In
permaculture, one is encouraged to turn the problems into solutions. I really
like that way of thinking! The many crevices between the stones turned out to
be excellent spots to squeeze in a lot of strawberry runners! I added wild
strawberries on the shady side and regular ones on the sunny side.
CR.jpg) |
| Solitary bee shelter protected from rain |
Here and
there, I left some bigger spaces between the stones to insert my solitary bee
shelters. My son selected a mixture of plant stems found in the garden with a
soft or hollow core for the bees to use as nesting places. These stems were then
cut in pieces of about 20cm long and inserted as bundles on the South-Eastern side
to provide them with as much sun as possible. Little pieces of broken plastic
pots served as a roof to protect them from rain and wind. In the coming months, solitary bees of all
sizes should find their way into these little caves, lay their eggs inside, and then close the entrances with chewed plant material to leave them
to develop into baby bees by next spring.
zCR.jpg) |
| Bumble bee nest integrated |
zCR.jpg) |
| The inner parts of the bumble bee nest |
The bumble
bee nest was made of bits and pieces found in the shed and the garden: a flower
pot, a piece of chicken wire, a piece of flexible tube, some pebble stones for
drainage and aeration, and some soft nesting material, like dried moss. With the
entrance turning South-East, all of it was then covered with the soil and plants. Unfortunately,
I did not find any mouse droppings to add to the nesting material, which should
be a bonus to attract the bumble bees to start nesting there. Hopefully, this will
do the trick.
CR.jpg) |
| Drainage layer inside the spiral |
CR.jpg) |
| The sandy layer inside the spiral |
CR.jpg) |
| Rosemary, sage, oregano, and thyme |
CR.jpg) |
| Thyme, oregano,and savory |
I just
loved to do the final bit: adding the plants. I took some shoots of lemon balm,
some mature thyme and chives from the old herb patch. The other plants I bought
at an organic farm: several species of oregano, summer savory, garlic chives,
sage, rosemary, spearmint, and of course the strawberries. All the plants have their own specific niche:
in the shade or sun, dry or wet, sandy or soil with humus. This should be the
base of a self-supporting ecosystem with very little maintenance.
CR.jpg) |
| Grass clippings added as a mulch layer |
Just before
we left, I added some grass clippings on top of the bare soil between the
plants. This should prevent too much weed from popping up and protect the soil from
sun, wind, heavy rain fall, or drought. To make up for the square look of the brick stones, I added some round shaped pebble stones collected on our beach to decorate the spiral. The two
water collecting devices are also important to me: to provide some drinking and bathing water for
birds, who will then leave their droppings as fertilizing presents for the
plants, but also to provide water for bees and butterflies and other useful insects. The dish at the bottom is meant for the little hedgehogs (and other small mammals) which we are hoping to see in our garden.
CR.jpg) |
| The final result: my own herb spiral ready to go! |
I look very
much forward to follow the life in and around this little wildlife hotel the
coming seasons!
Subscribe to:
Comments (Atom)